Posts

3D Chess Set: Putting all the Pieces Together

Image
  For the final project, I was tasked to design and 3D print each key piece included in a chess set. I decided to implement my love of character design into my concept for the set, as I went with a theme of a sort of other-worldly and robotic set of pieces. I think each and every piece comes with a little bit of personality while still being unified with the other pieces. I am really happy with how all of the pieces turned out and it was really fun playing around with 3D technology! I took all the feedback from the peer review session into account when going into the final stages, and I am really proud of what I have been able to create. I'm looking forward to trying out more things involving 3D technology and 3D printing in the future. base models before meshmixer concept sketches bishop king knight pawn queen rook

Reversed Engineering: Final Power Bar Model

Image
  The final touches for the reversed engineering project have now been officially completed. I tried my very best to replicate my model to the original design and measurements as much as possible, and I am very happy with the final result. This project was extremely time consuming and with the amount of issues that I had to deal with along the way, I am just glad to move onto other projects. It was quite frustrating modelling a specific piece only to realize I measured it wrong. Despite that, I do feel like I learned a lot from this project that I wouldn't have otherwise, so I am glad that I took this on. A part of me wishes I chose a simpler object to model, but I am glad that I challenged myself and learned so much along the way. I am proud of everything that I was able to accomplish with this project. Exploded Model

Reversed Engineering: Update and Progress on the Power Bar Model

Image
  As a continuation of the reversed engineering project, I have continued to model the power bar and have successfully created all the major parts in 2D. At this point, I am almost ready to extrude my pieces and finish modeling the final object. I hope to have all the pieces modeled accurately and finish within the given time of the project. I have the two major pieces along with the inside views made in 2D, along with the long metal strip that sits in the middle. Hopefully the rest of this project will go much smoother than my last update. I am looking forward to working on more.

Surface Design: Final Lasercut

Image
  Here is the final lasercut design for the surface design project. I played around with the values quite a bit before cutting, so that I'd get the perfect result the first time around. I am super happy with how all the different values translated into the wood. It created a visually interesting final product that I am extremely happy with.

Reversed Engineering: Taking Apart The Object

Image
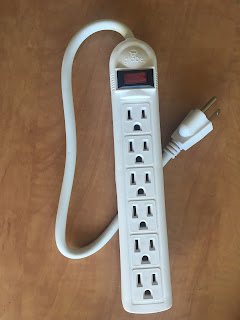
 As a follow up to my previous post, I decided to choose the power strip as my object for this project. Unfortunately, I ran into a multitude of problems when beginning this project that made things a lot more difficult for me. My first issue arose when I bought a digital caliper off of amazon only it to break as soon as I opened it from the box. My luck only goes downhill from here. Next, I was having issues opening the power strip, as not a single screwdriver I could find could even open the thing. I eventually had to borrow both the caliper and a specialty screwdriver from my roommate, so shoutout to Becca, you are a literal lifesaver. I literally would have made zero progress on this project without her. Moving on, I began to observe my object and start sketching. I wrote down a bunch of measurements and made a quick sketch of all the neccesary parts before finally moving into Rhino. I really tried to get a base down this week so that I had at least a little progress in the program

Reversed Engineering: Deciding The Perfect Item To Take Apart

Image
Here's the beginning of my planning for the Reversed Engineering project. I'll be honest when I say that this was a very difficult process for me. I had very little items that I was comfortable in messing around and potentially taking apart. I felt a bit restricted being in dorms as I only have the necesssities with me, while imagining all the cool and interesting objects I have back at home in BC that would be perfect for this project. But alas, I must work with what I have available. The first object that I thought would be cool to take apart and recreate was this power strip. I think recreating all the little grooves and holes in Rhino would be super fun, so this is the item that I'm currently leaning towards.  The next item is this headlamp that I found. I thought it would be interesting to look at the inner workings of it, specifically how all those small parts fit together, but it's definitely not my first choice. And finally I decided to take a look at my old com